Showing posts with label chanel. Show all posts

Wednesday, June 25, 2014

chanel. eye candy.

talk about eye candy. this bag is amazing.
no diy attempts will be made. ever. i'll just stare at this picture till i get tired/sad. 


image via purse blog


Tuesday, July 2, 2013

diy. chanel espadrilles.

summer flats made easy.
uber expensive chanel espadrilles for just over $22.


SUPPLIES

1. a spool of thread and a needle
2. a chanel logo print out to be your stencil
3. old denim (color of your choice)
4. sharp scissors
5. aldo touggourt flats in navy & white 
on sale for $22.48

MORE AFTER THE JUMP

Monday, March 19, 2012

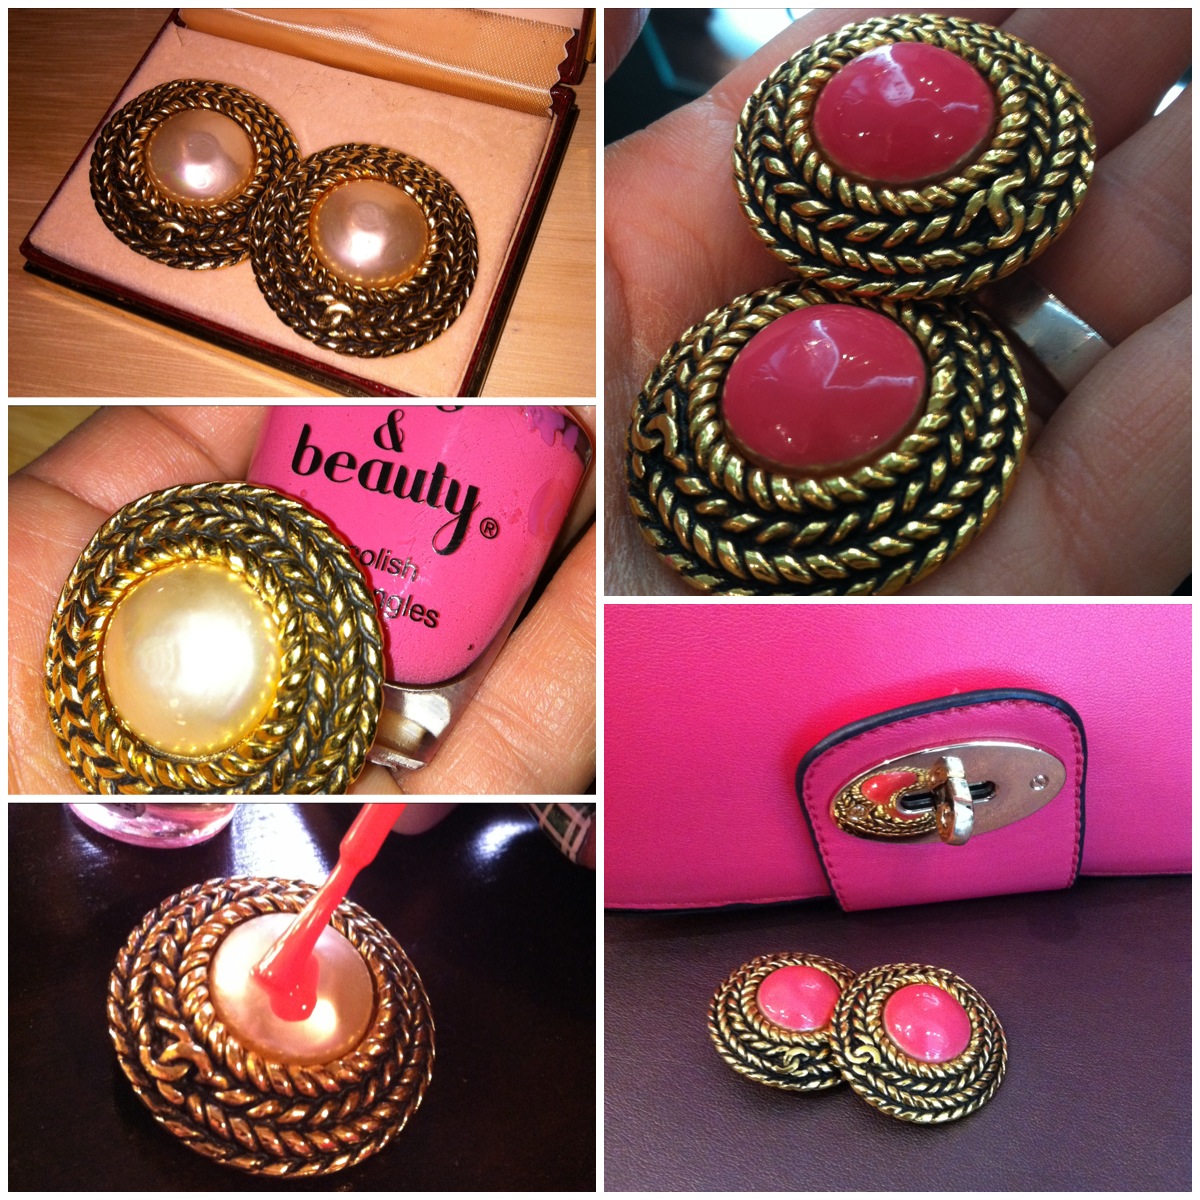
diy. painted pearls.

  My roommate gave me these giant vintage Chanel pearl clip on earrings 
for my birthday but they needed a face lift. [per her suggestion]


All you do is take a nail polish color of your choice [mine was forever 21 :: pink]  
and carefully paint over the center pearl.  I did about 3 coats.  You can sort of still see 
the original pearl around the edges, but nothing that anyone else will ever notice.  


If you don't have Chanel earrings, 
just grap something that needs an update 
& slather some nail polish on it.
Have fun!

Sunday, February 5, 2012

DIY. chanel button earrings.

Designer buttons turned into earrings!


1. Spray paint your buttons & let them dry.
2. Use nail polish remover to remove all paint except for the crevices.
(it will happen naturally) 
3. Superglue on earring posts.
(i found mine at Michael's - $3.00 for 20)
When placing the posts, glue them towards the top, 
if it's centered the logo will have the opportunity to spin around. 
If it's at the top, it will stay put after you put them on.
4. Let them dry, add your own backings & you're done!!!

Wednesday, January 25, 2012

chanel mohawk.

Chanel Spring 2012 Couture.

left: Cara Delevingne / right: lindsay wixon

couture mohawk.
i love a good mohawk.

images via glam

Monday, December 5, 2011

DIY. chanel serving tray.

My friend Jessica mentioned this DIY project to me, so I had to check it out...
This girl really nailed it... & I love The Aestate blog... I'm so happy I found it.

I just wouldn't have a place for something like this in my home...
It's just too good not to share!


For the full tutorial from The Aestate