
I made all of these paper snowflakes two years ago...
such beauties but they don't store so well.
Each snowflake uses:
6 sheets of paper,
scotch tape,
& scissors...
then fishing line to hang them.


I attempted to make my own video, but my camera angles were no good so you are stuck with these pictures...

1. start with a square sheet of paper & fold it in half
2. fold it in half again
3. cut 5 slits into the triangle... careful not to cut all the way through
(cutting from either edge works the same)
4. it should look like this

5. unfold your piece of paper
6. so it looks like this
7. start with the 2 inner pieces and roll them together (either direction)
- securing it with a small piece of tape
8. turn it over and take the next two inner pieces and connect them with tape
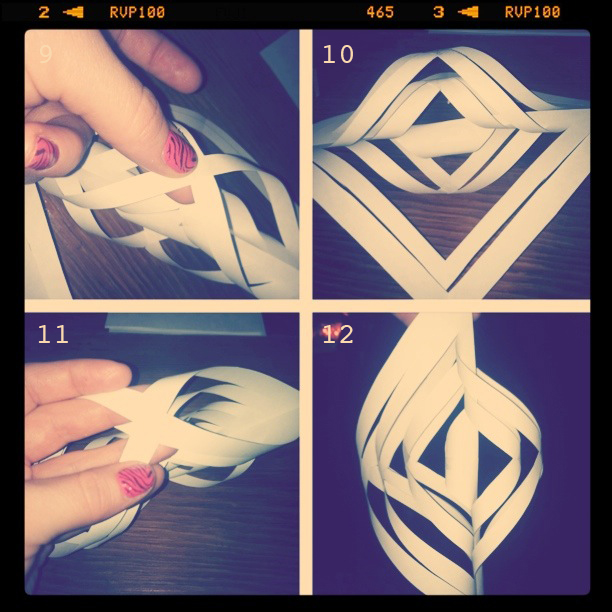
9. 10. 11.
continue taping the appropriate pieces together
& flipping it back and forth to alternate the sides
12. this is what the finished section will look like
- make 6 of these

13. take three of your finished sections and gather them in the center
14. secure it with a staple
15. things should be starting to shape up :)
16. where the sections naturally come together...
(where my fingers are in #16) put in a staple to secure it
- continue doing this to all of the sections

17. take your first half
18. join your second half & staple it
19. finish stapling all connecting pieces
20. wow wasn't that easy?
If you wan't to punch it up... try some other colors like the fun ones below...
Also make sure to experiment with the distance between the slits you make...
that way they will all be unique if you are making a bunch!!!


No comments:
Post a Comment